L2SPICE Quick Guide – v0.8
What is L2SPICE?
L2SPICE bridges LibrePCB schematic design and SPICE time-domain simulation. It converts LibrePCB schematics into JoSIM or JSIM netlists (and writes changes back), runs the simulators straight from the GUI, and plots the results. A command-line interface is available for scripted and batch conversions.
You work with L2SPICE and LibrePCB side by side: L2SPICE opens LibrePCB automatically on the schematic whenever you create or open a circuit. Draw in LibrePCB, convert and simulate in L2SPICE.
Requirements
- The SuperLibre Superconductor library installed in LibrePCB — see the description. It provides the current, voltage and phase sources, the superconductor devices and the JoSIM/JSIM control commands that L2SPICE knows how to convert.
- Optional: the JoSIM and/or JSIM simulator. The FrugalEDA installer bundles both; with a standalone L2SPICE, set their paths in Settings.
Key concepts
- L2SPICE project — groups one or more circuits, their shared subcircuits, and the files derived from simulation (time-domain results and more).
- Circuit — a LibrePCB schematic paired with its SPICE netlist(s). L2SPICE keeps the two sides synchronised and shows their agreement as a status pill (Synchronised, Schematic changed, …).
- Workspace — the folder holding your projects. L2SPICE discovers projects there automatically and lists them on the welcome screen.
Step 1 – Open or create a project
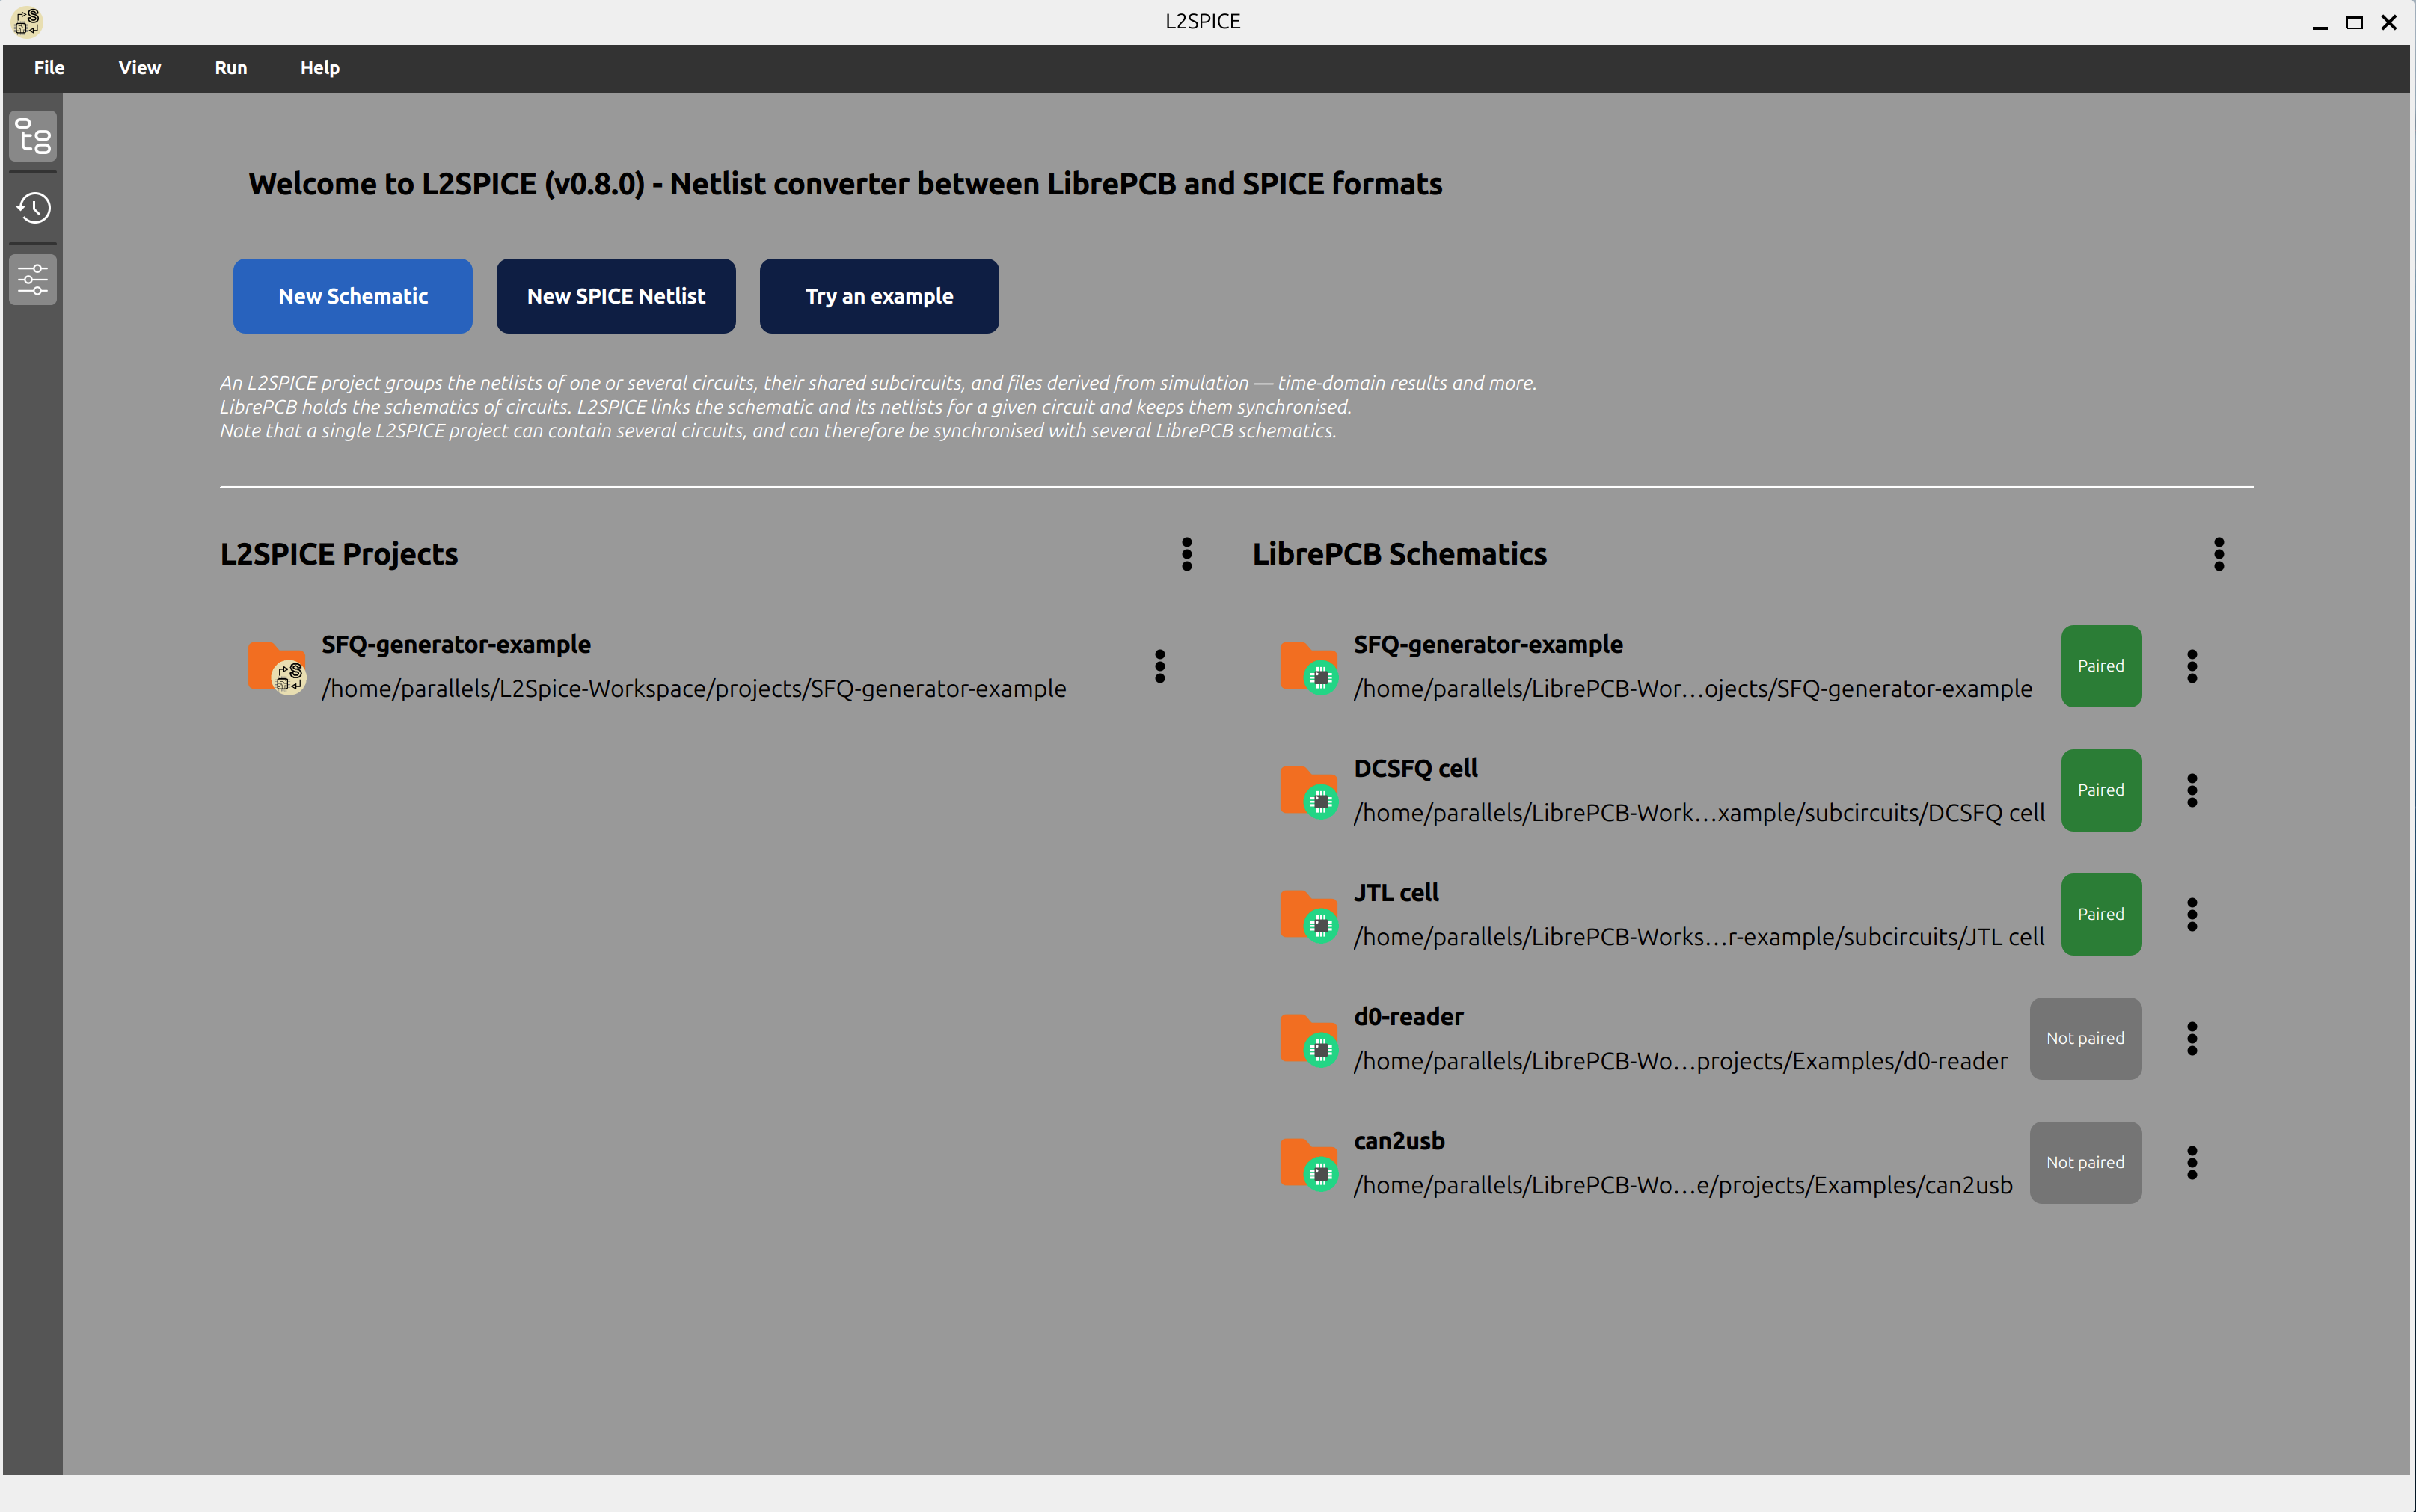
From the welcome screen:
- Try an example — copies a bundled circuit into your workspace as an editable project, converts it, and opens it (with LibrePCB on its schematic). The quickest way to see the whole workflow.
- New Schematic — creates a new circuit and opens its schematic in LibrePCB.
- New SPICE Netlist — creates an empty netlist circuit (no schematic).
An existing project is reopened from File ▸ Open L2SPICE Project… or from the workspace list.
Step 2 – Convert the schematic to SPICE
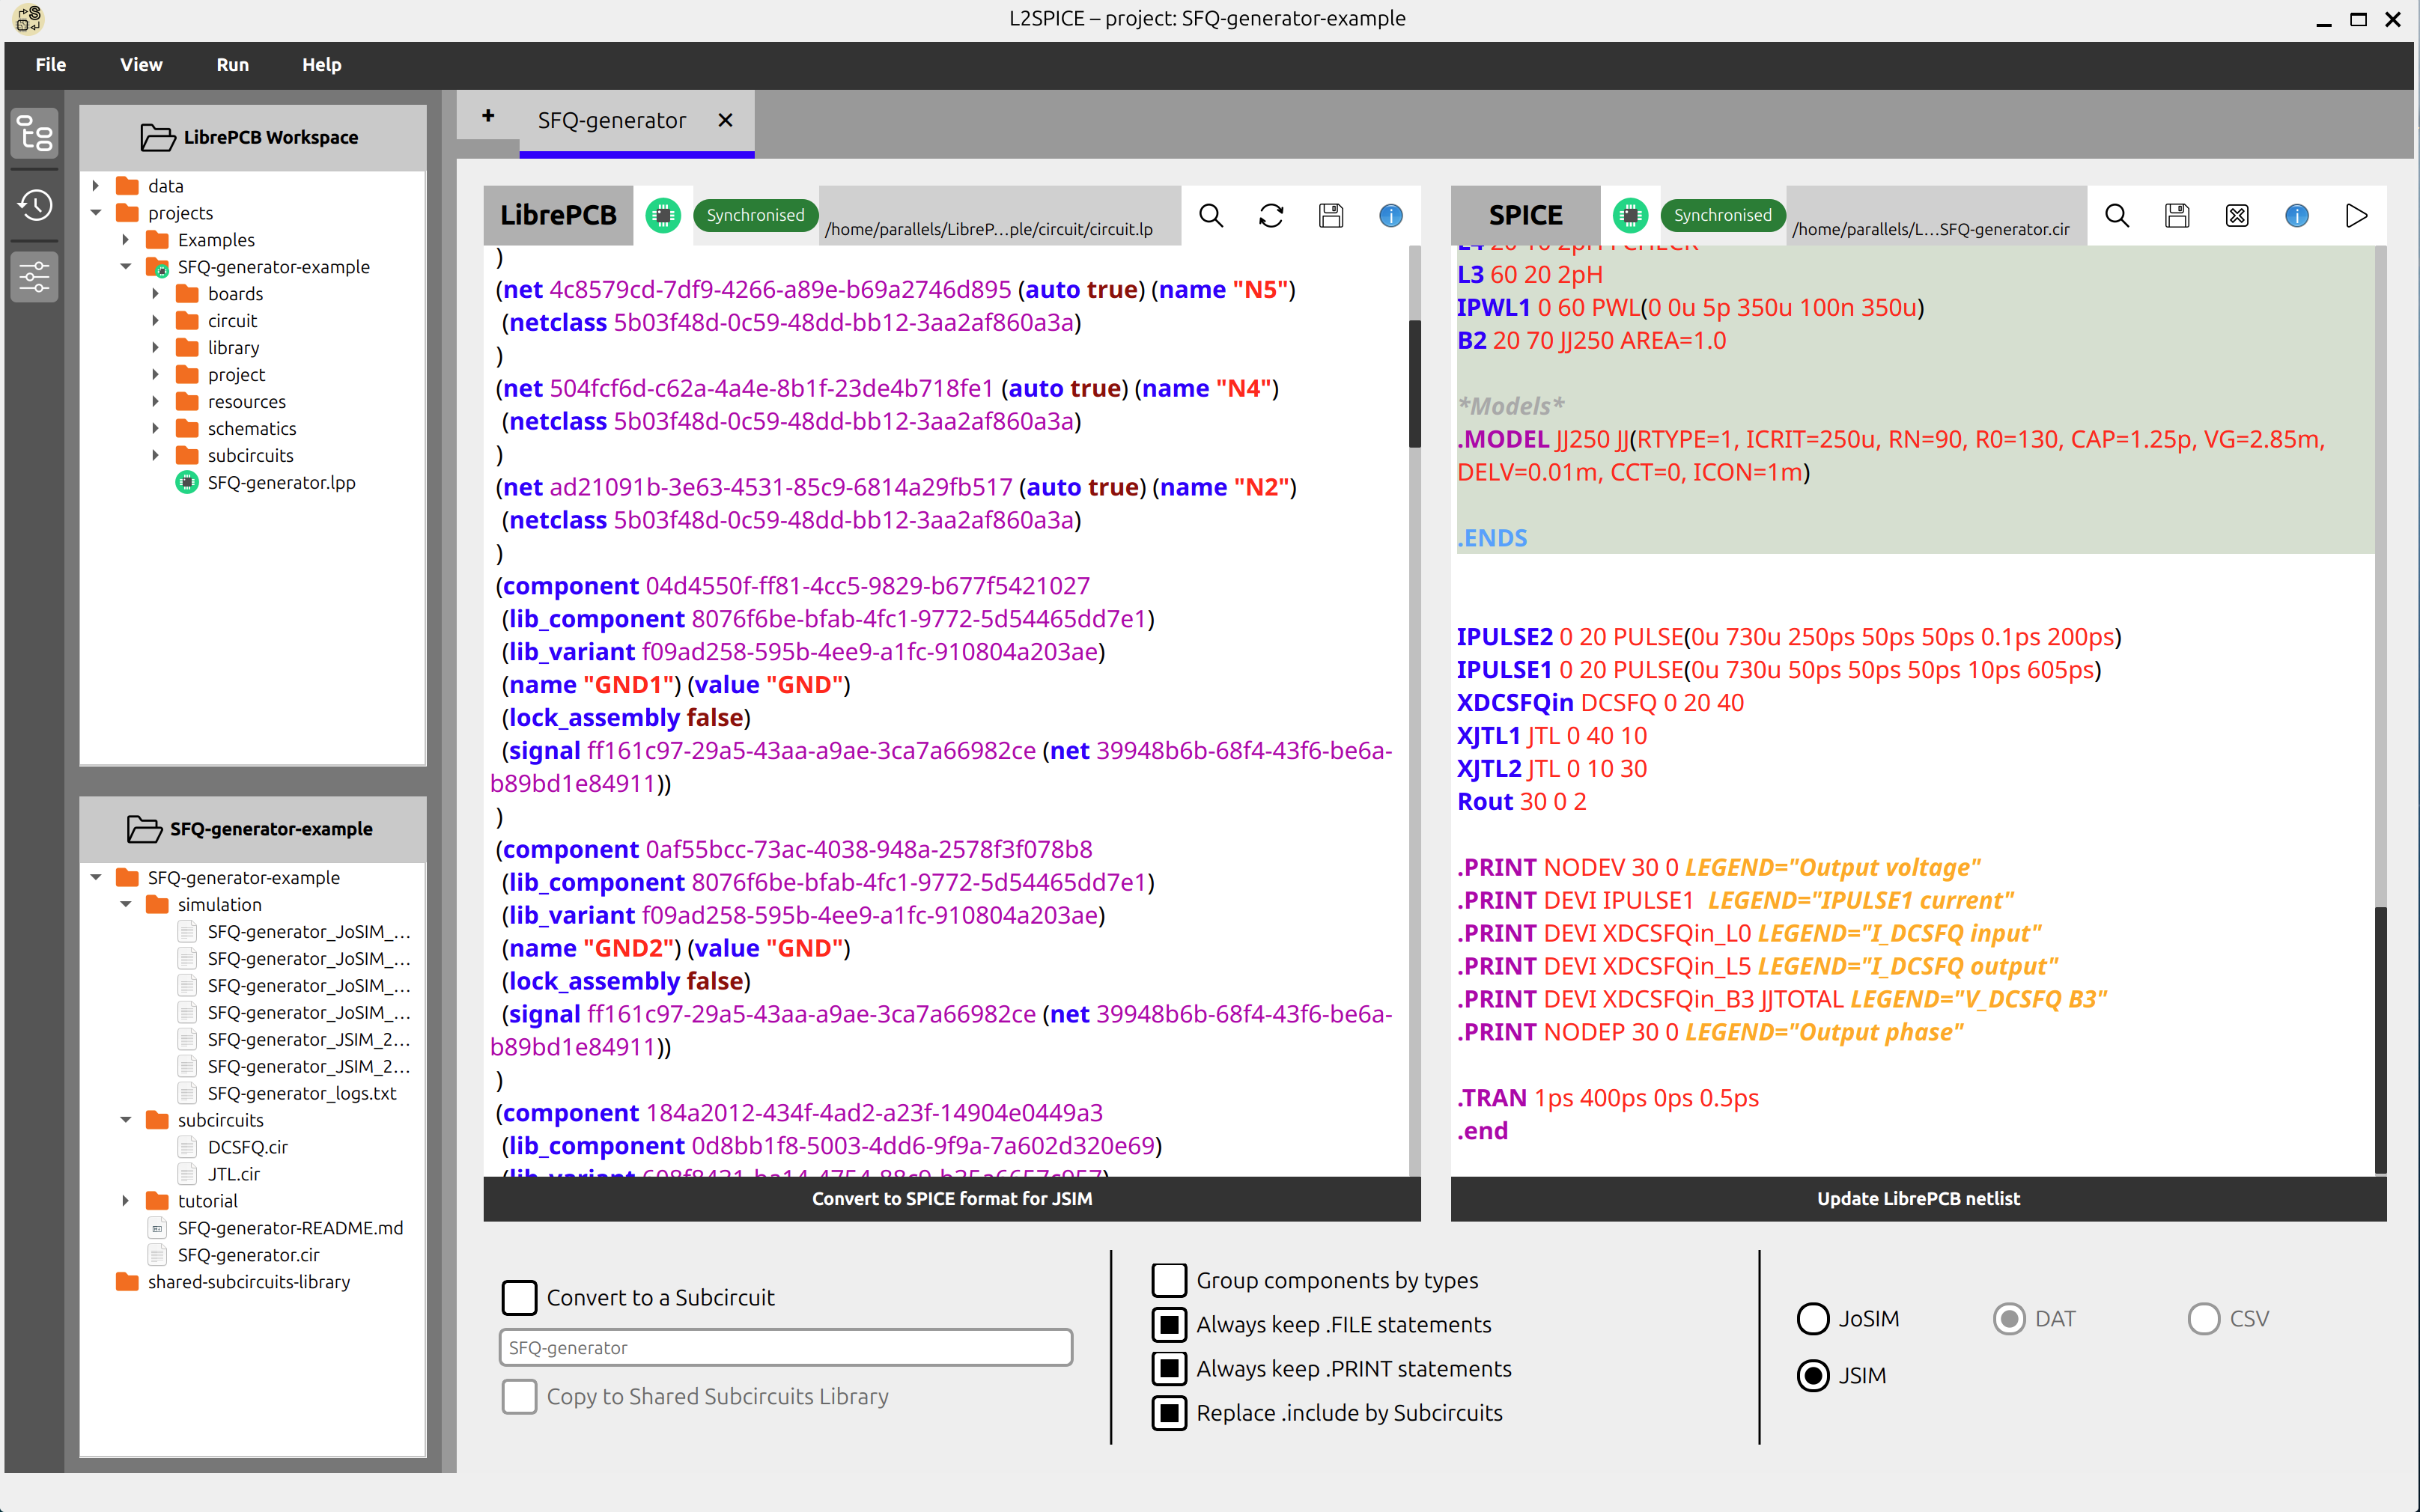
Each circuit opens in a tab with two panes: the LibrePCB netlist on the left and the SPICE netlist on the right.
- Choose the target simulator — JoSIM or JSIM — in Run ▸ Default Simulator or in the Conversion parameters panel. Conversion differs slightly between the two, so set it before converting.
- Click Convert to SPICE format for <simulator> below the left pane. The SPICE netlist appears on the right.
The first time a project is opened, its main circuit and every nested subcircuit are converted automatically — no need to convert them one by one.
Step 3 – Back-annotate (SPICE → schematic)
Edit component values in the SPICE pane, then click Update LibrePCB netlist to write them back into the schematic. Component names, connections and source types cannot be changed this way.
Step 4 – Simulate
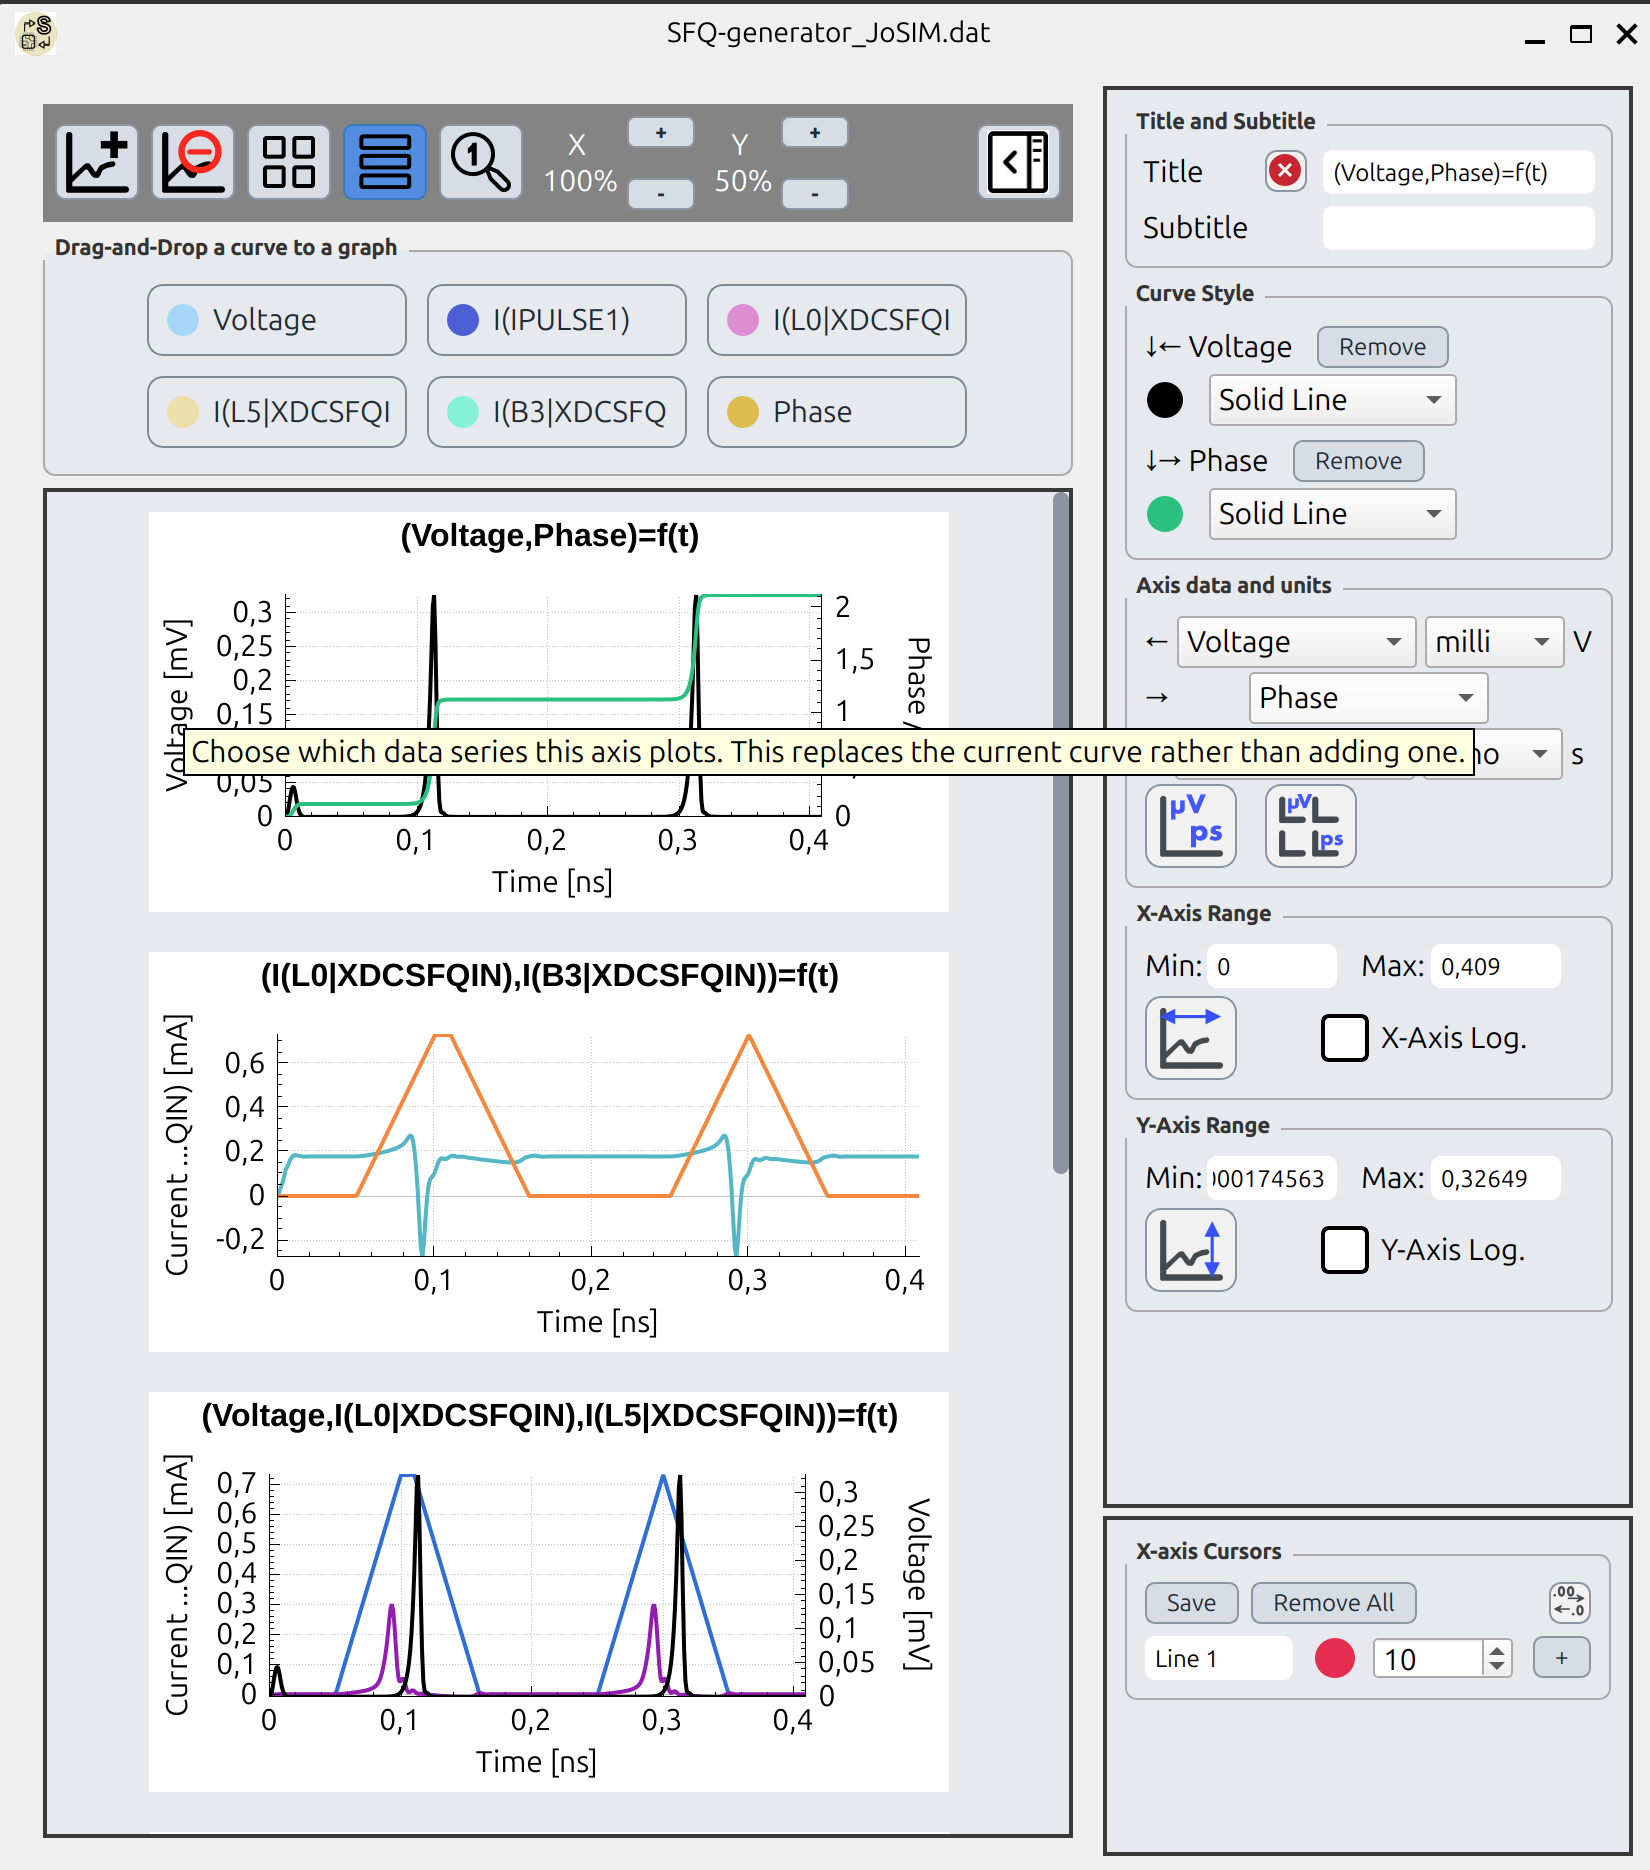
Run ▸ Simulate (F10) runs the selected simulator on the current SPICE netlist. Results are saved in the workspace and plotted immediately in the embedded FrugalPlot viewer — trackable curves, time cursors, selectable axis quantities, zoom and synchronised graphs (see the FrugalPlot manual).
Step 5 – Save
File ▸ Save Circuit (Ctrl+S) saves the circuit's netlist and its schematic; Save L2SPICE Project saves every circuit. Save Circuit As… forks an independent copy of the circuit (SPICE side plus its LibrePCB project) under a new name.
Panels
Toggle these from the View menu or the buttons on the left edge:
| Panel | Content |
|---|---|
| Workspace overviews | File tree of projects, schematics, netlists and simulation results; double-click to open. |
| History | Every conversion and back-annotation state. Step through them with Ctrl+← / Ctrl+→ (⌘← / ⌘→ on macOS) and jump to the latest with Ctrl+↓ (⌘↓). |
| Conversion parameters | Subcircuit options, output options (.PRINT / .FILE handling), and component grouping. |
Settings
Open Settings (F8) to set the JoSIM / JSIM executable paths, the workspace location, the netlist header template, the history size and the default file-dialog directories.
Going further
- First design with FrugalEDA — a full worked example.
- L2SPICE user manual — menu-by-menu reference.
- L2SPICE CLI — scripting and batch conversion.
FrugalEDA is open source software. For the latest updates and source code, visit our repository.